
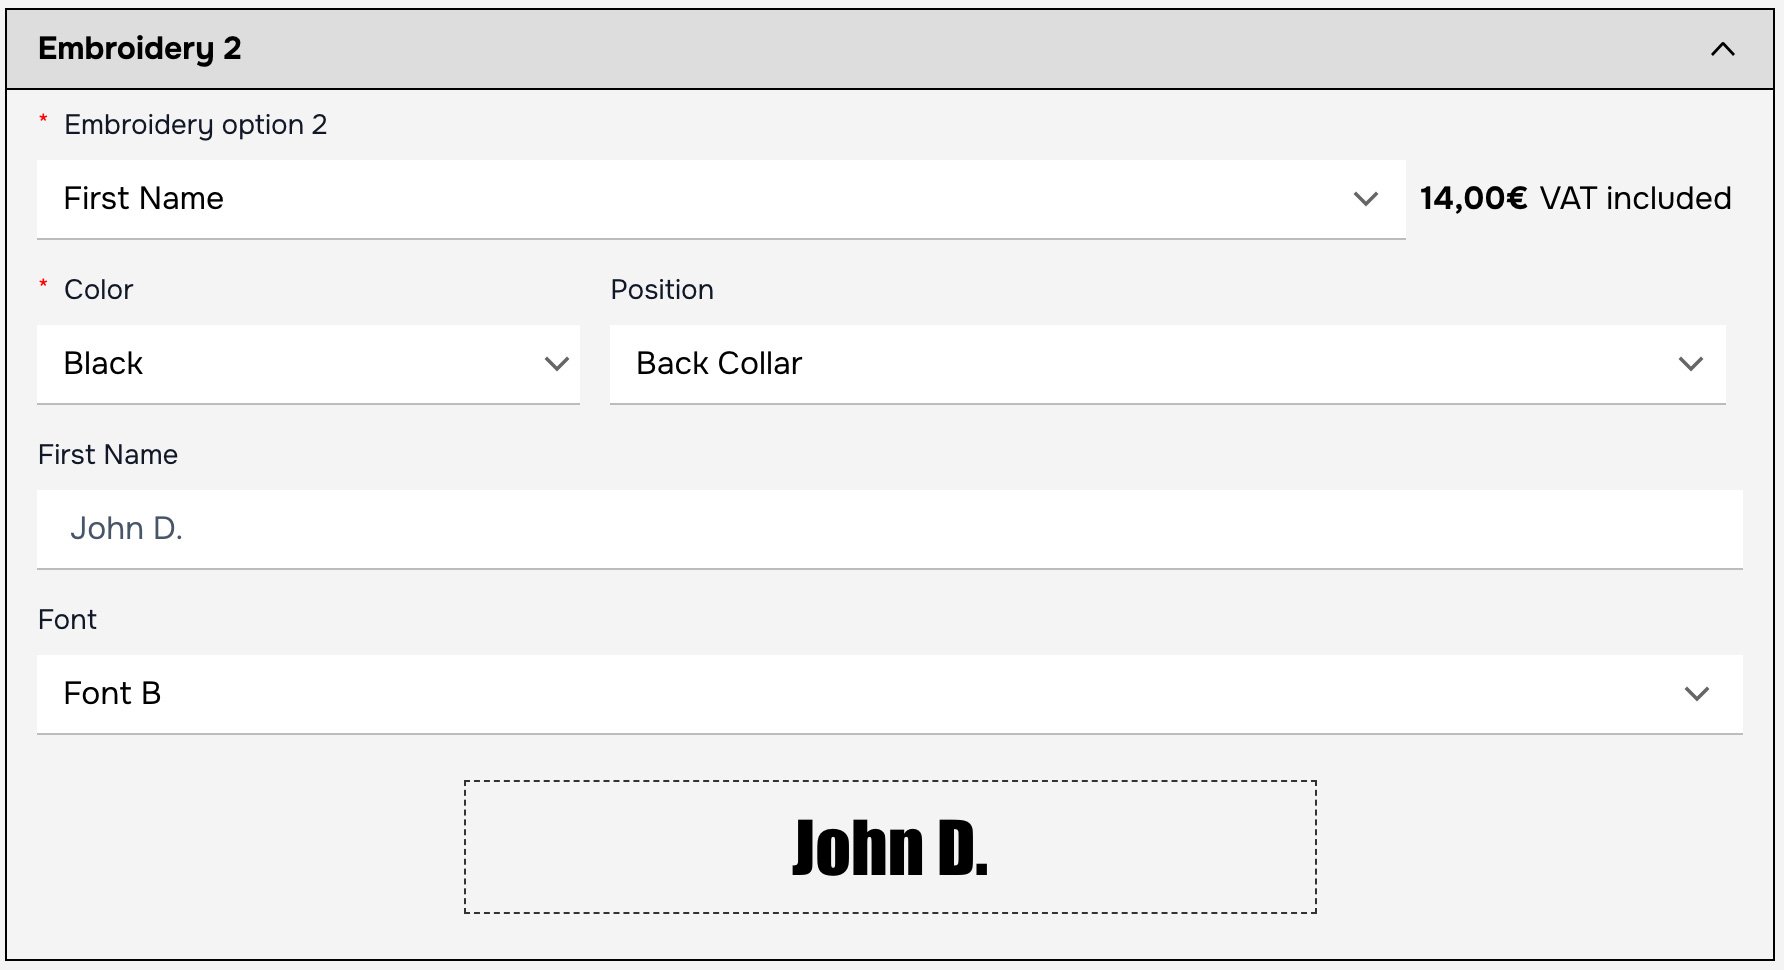

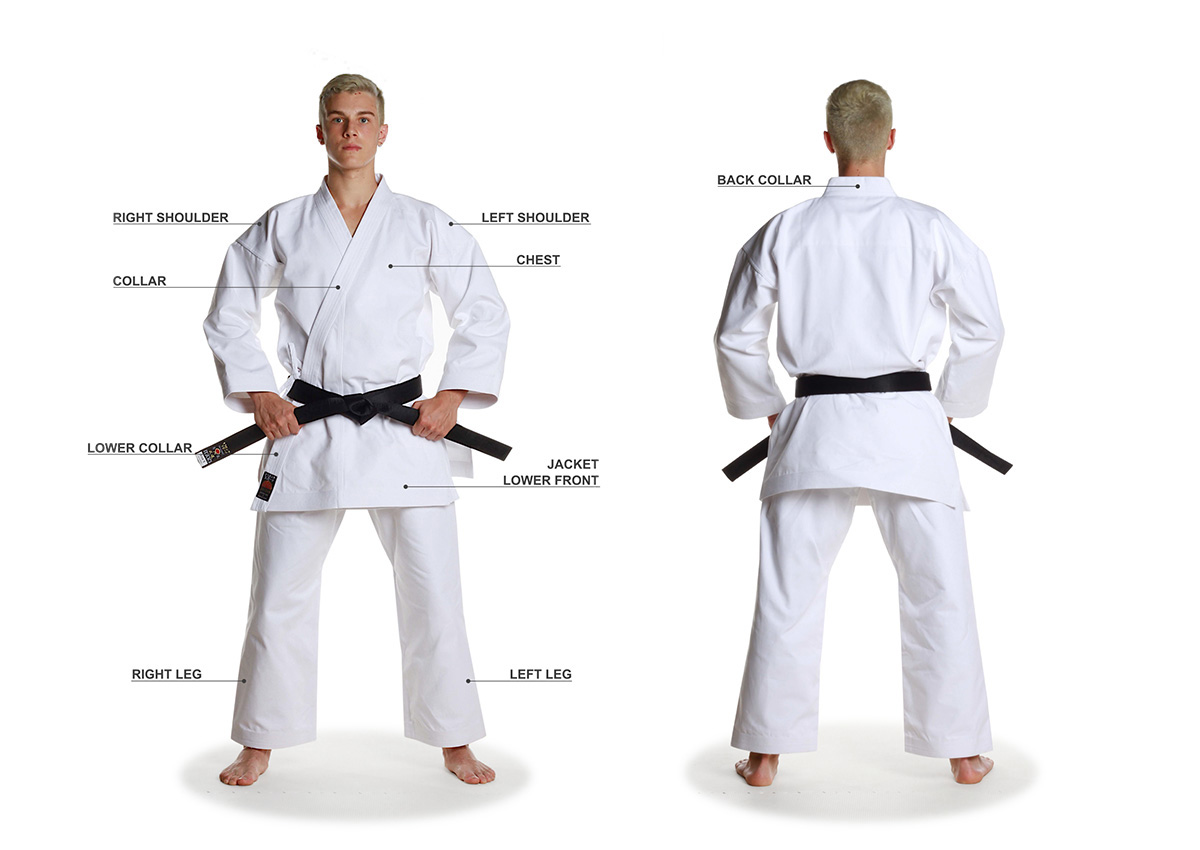
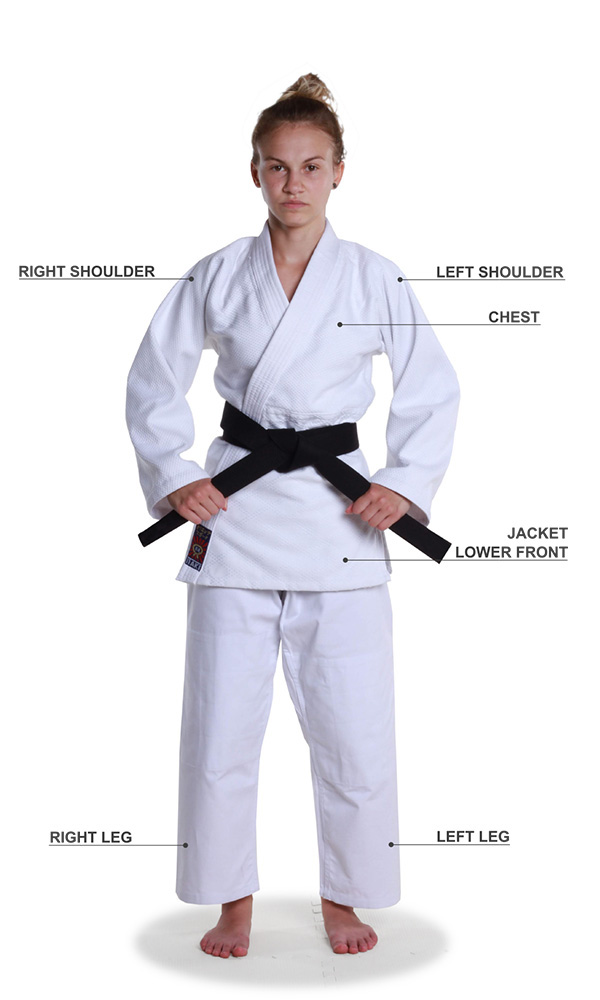


Embroidery on the collar of the judogi is not possible because this part of the garment is made with multiple layers of fabric and reinforcements to ensure maximum durability during grips and the stresses it undergoes. Due to this construction, the material becomes too dense for the needles of standard embroidery machines, which are unable to penetrate it properly.
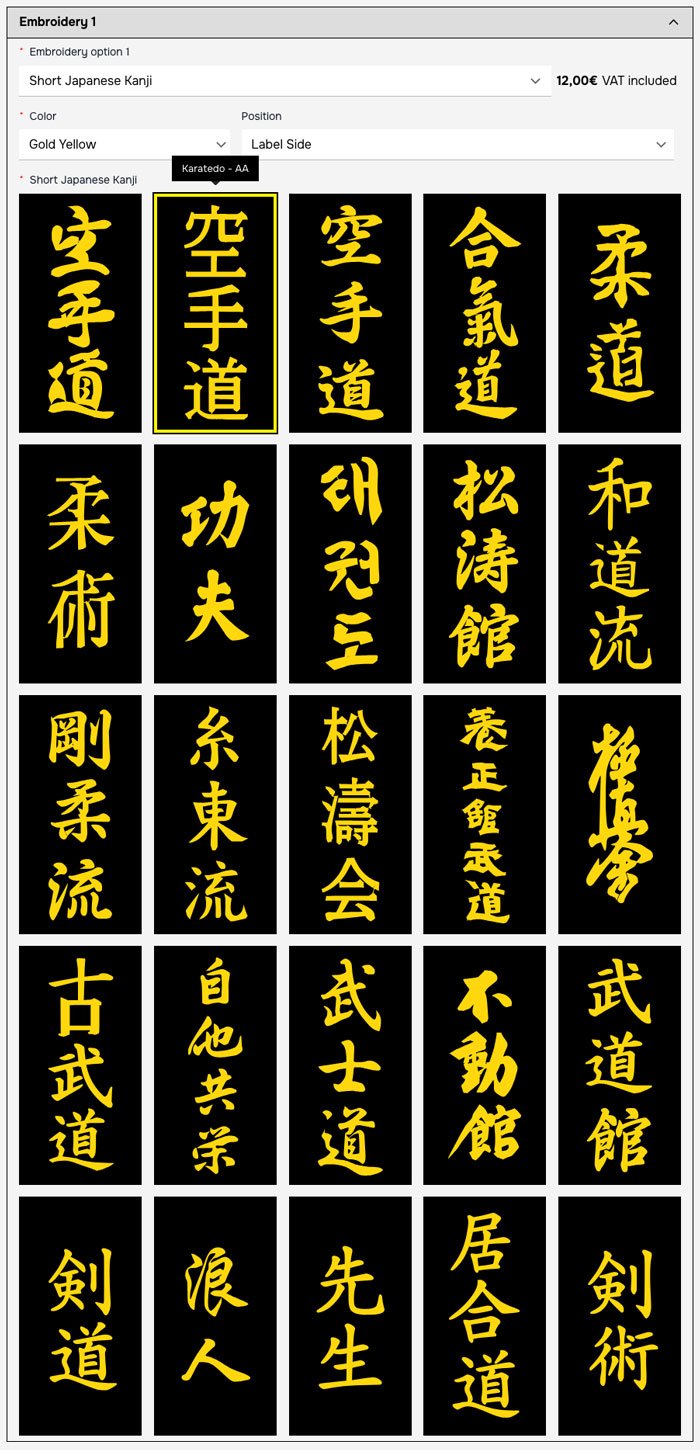
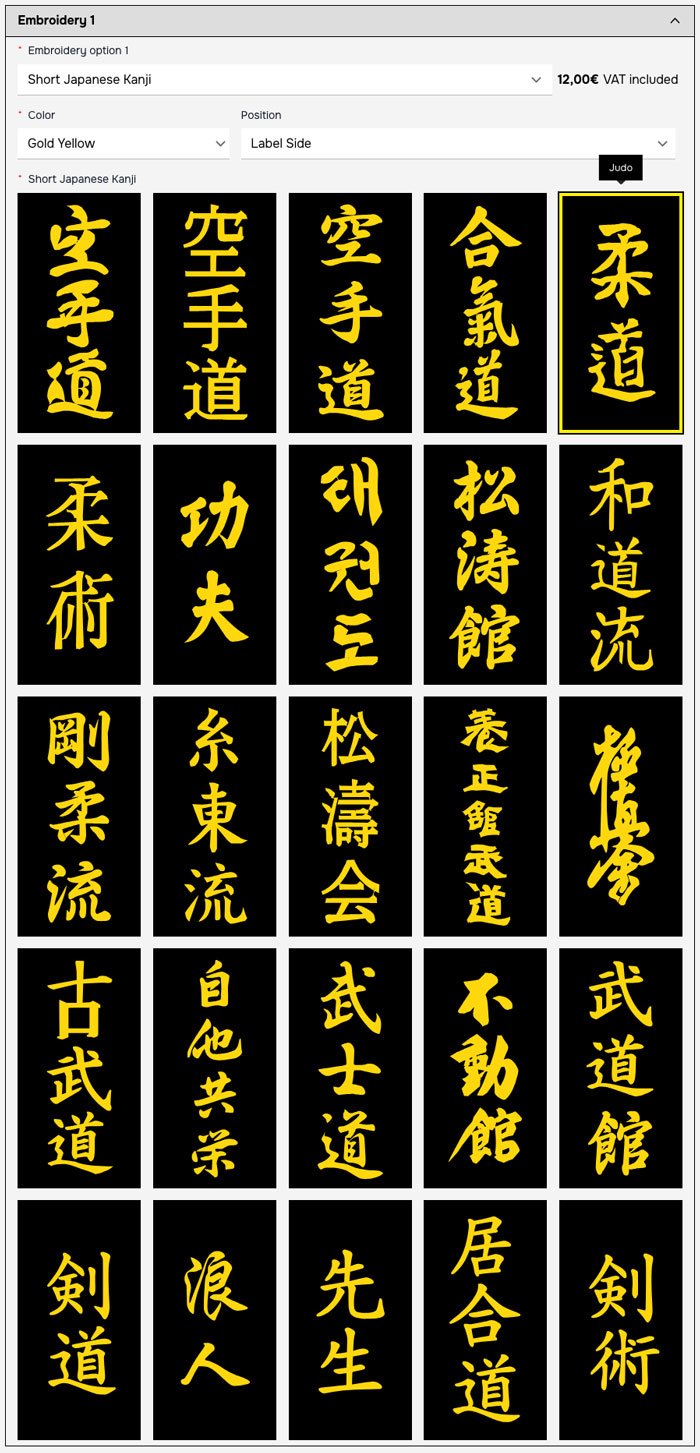
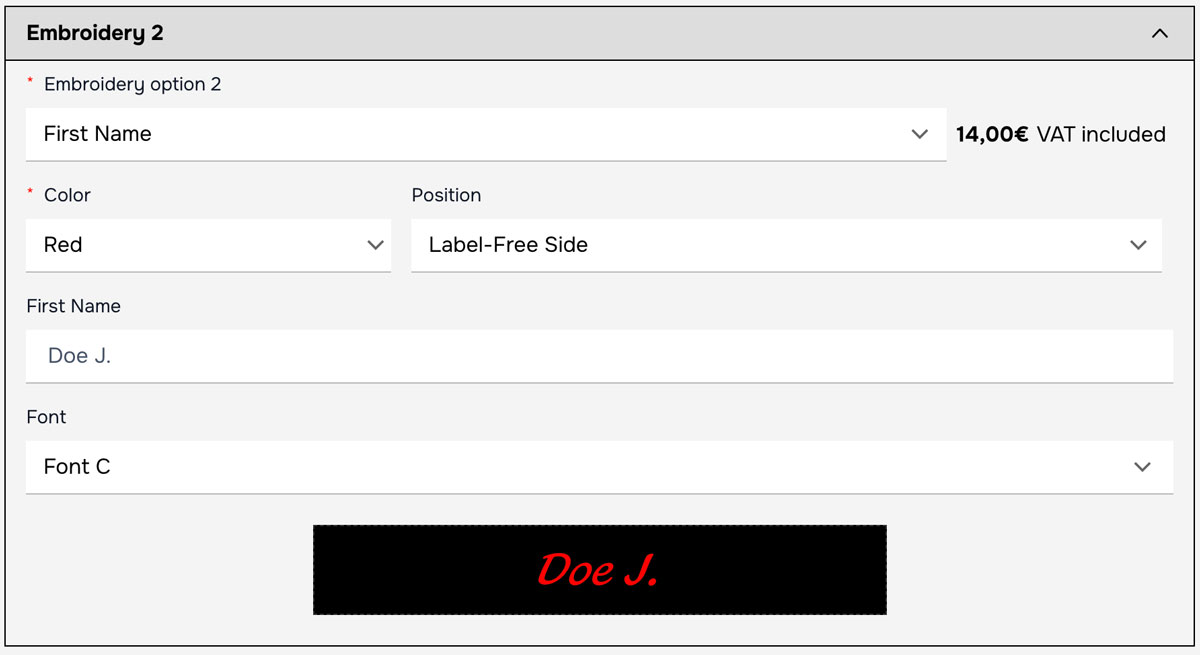
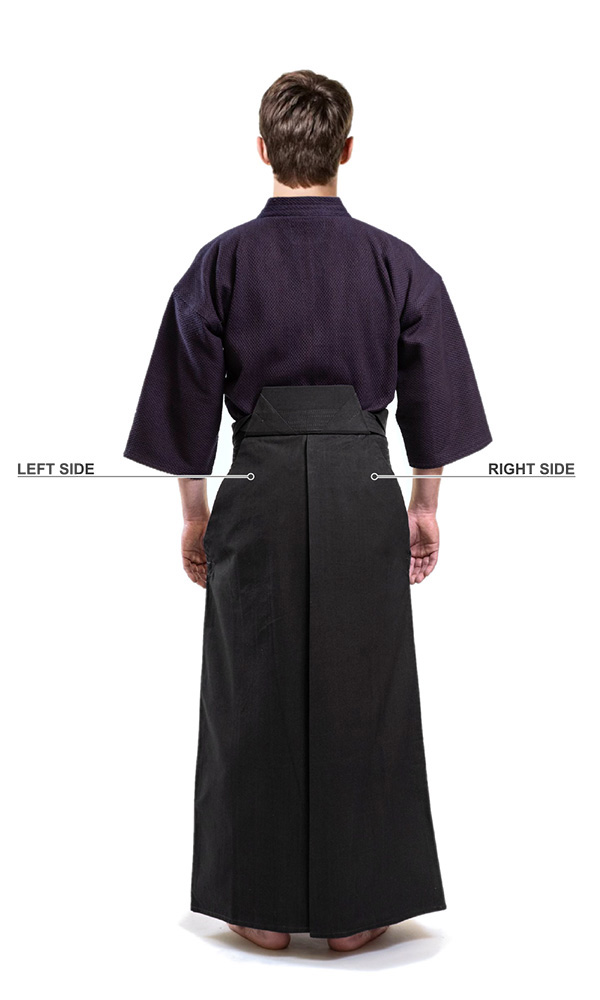
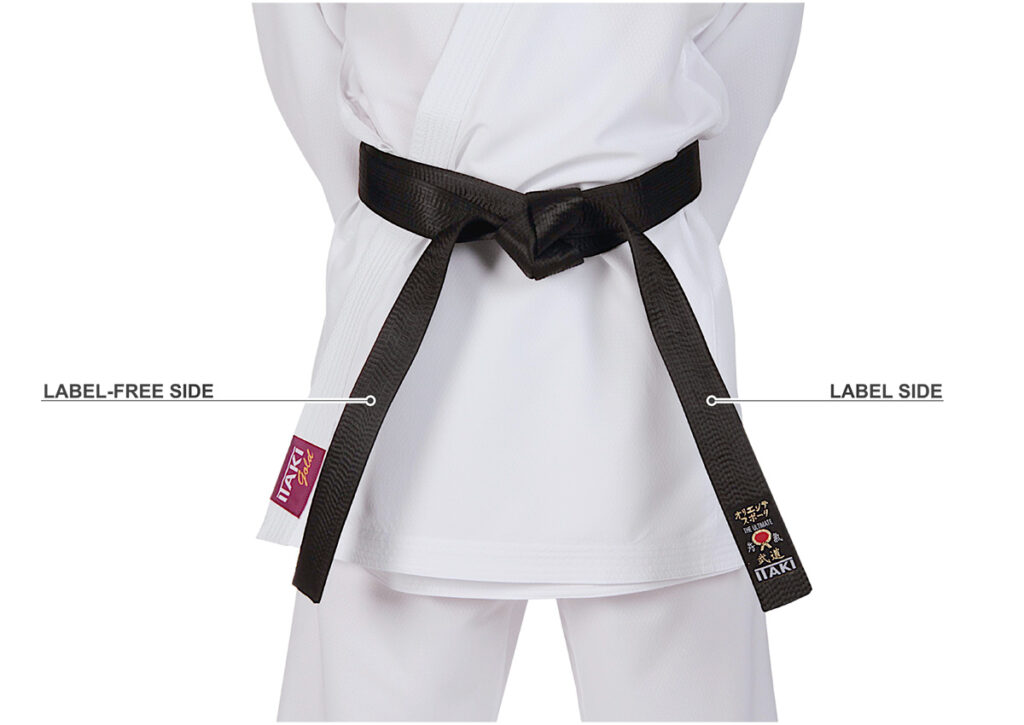
The ‘label side’ refers to the end of the belt where the brand label is applied, while the ‘opposite label side’ refers to the opposite end. For belts with double labels, such as those approved by the IJF, the ‘label side’ corresponds to the side with the brand label.
It is important to note that the ‘front’ of the belt, where the embroidery is placed, is always the same — the side with the label. However, some customers prefer to tie the belt in a particular way and request embroidery on the side opposite the label. In these cases, it is essential to contact us immediately after placing the order to arrange this specific customization.
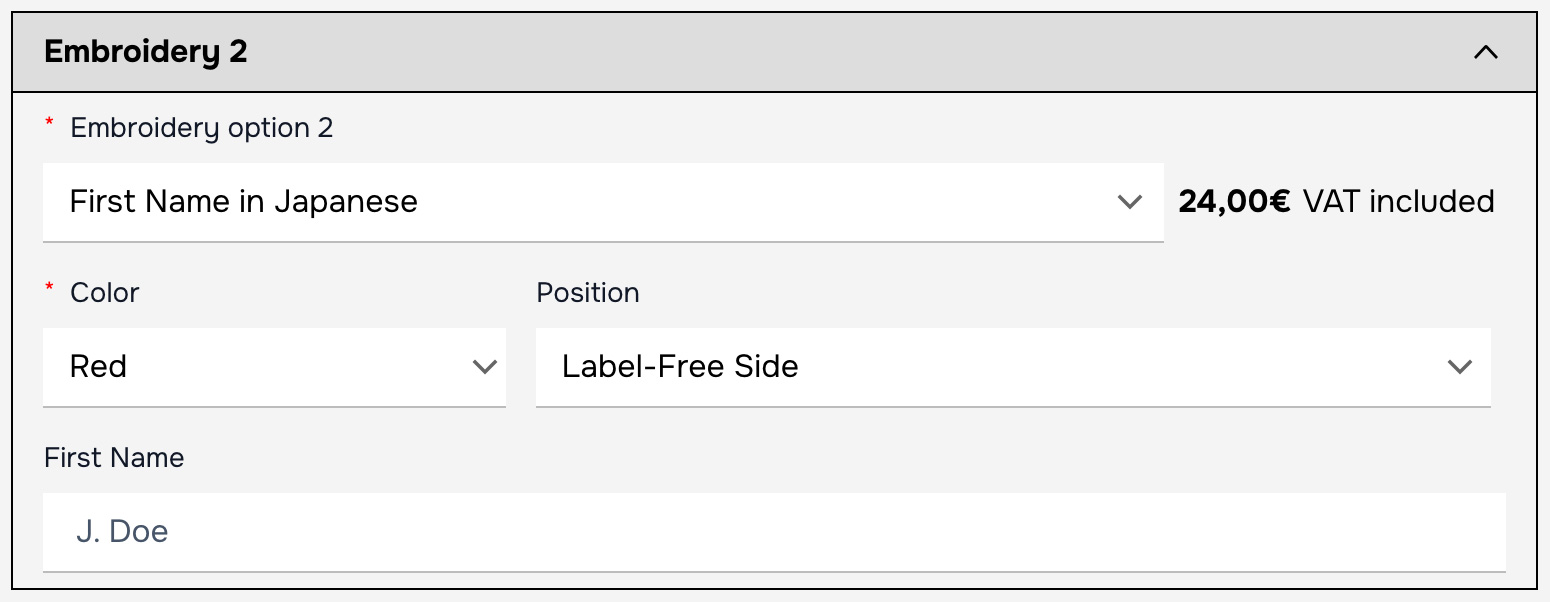
Translating a name into Japanese characters means adapting it to the Japanese phonetics using the katakana alphabet. The katakana alphabet is a syllabic writing system used in Japanese to represent foreign words, onomatopoeia, or proper names of people, places, and non-Japanese brands.
This process is not a literal translation but a phonetic transliteration, where the name’s original sound is matched as closely as possible with the sounds available in the Japanese language. For example:
- “Marc” becomes マーク (Mā-ku).
- “Oliver” becomes オリバー (O-ri-bā).
- “Jimmy” becomes ジミー (Ji-mī).
How transliteration works:
- Phonetic adaptation: Japanese has a limited set of sounds, so some sounds are modified to approximate the original. For instance, the sound “v” is often replaced with “b” or “u” (e.g., “Victor” becomes ビクター, Bi-ku-ta).
- Japanese syllables: Since Japanese doesn’t have standalone consonants (except “n”, ン), every sound is adapted to a syllable made up of a consonant followed by a vowel, or just a vowel.
- Absence of certain letters: Sounds like “l” or “th” do not exist in standard Japanese, so they are replaced with “r” and “s” or “z”, respectively. For example, “Thomas” becomes トーマス (Tō-ma-su).
Translating a name into katakana is essentially making it “sound natural” to a Japanese speaker, focusing on sound correspondence rather than visual or conceptual translation.
Yes, if you already have the name or full name in katakana, you can enter it directly in the respective fields. This will ensure that the “translation” is exactly as you want it.
Yes, this is possible. Here’s how we handle custom embroidery:
1. We receive the design or embroidery request from the customer.
2. The technical feasibility of the project is evaluated, and payment is received.
3. A draft is sent for approval.
4. The embroidery is executed once we receive confirmation.
Details and Pricing
- Embroidery Setup (one-time fee, no charge for identical future embroideries): €70.00
- Embroidery cost (based on the number of ideograms):
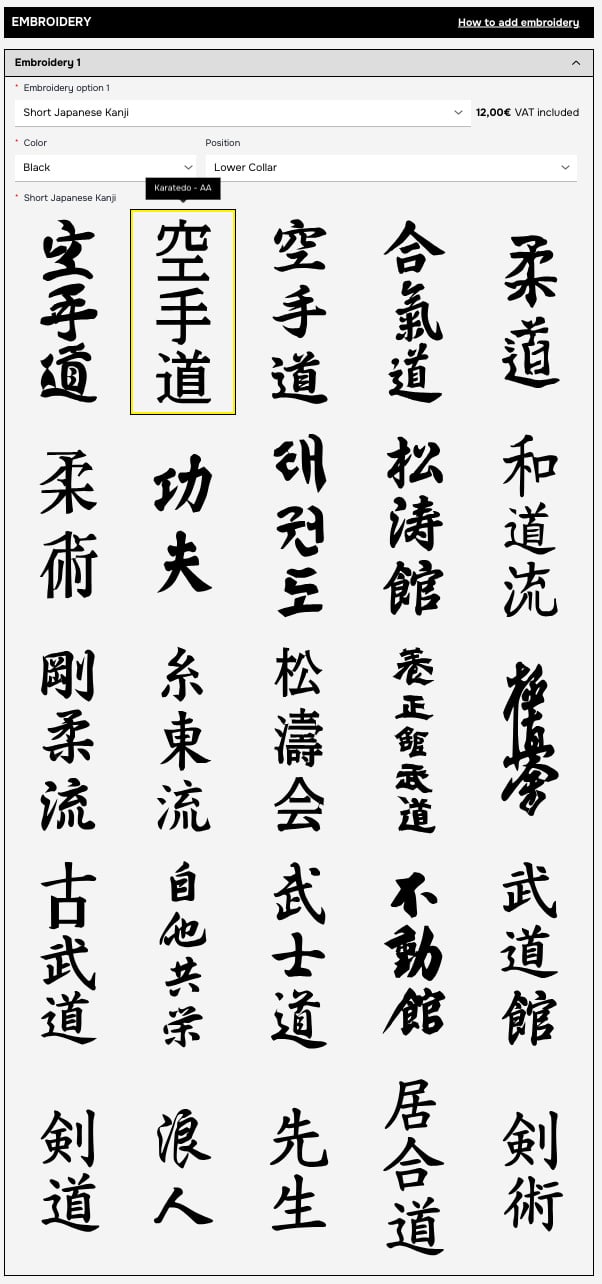
- Up to 3 ideograms: €12.00
- 4 to 6 ideograms: €16.00
- 7 to 10 ideograms: €20.00
- Over 10 ideograms: To be quoted.
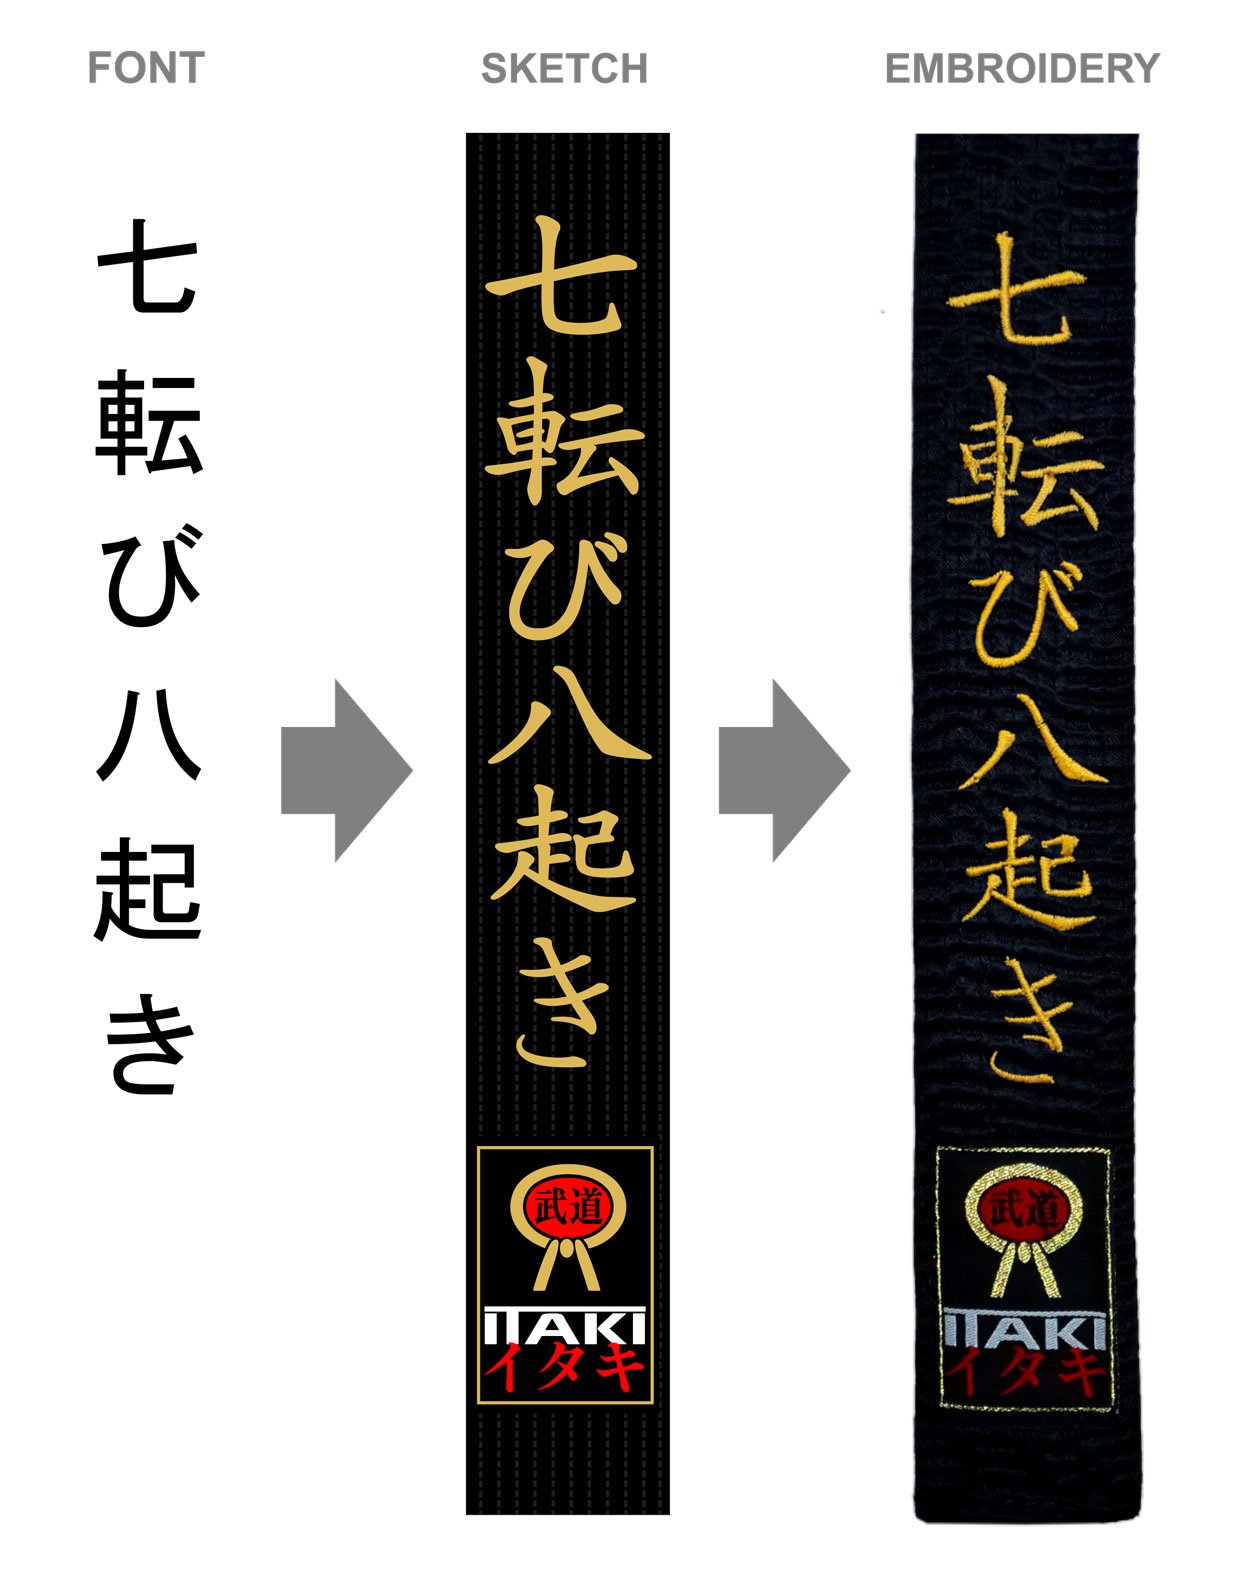
Embroidery requires breaking down the kanji into individual strokes to reproduce the “brushstroke” effect characteristic of each ideogram.
If you wish to proceed, we invite you to contact us by email indicating the type of embroidery you would like to have.
Example of a Japanese Proverb Embroidery:
The proverb “Fall seven times, rise eight” (nana korobi ya oki).
Certainly! It is possible to personalize the judogi or karategi with your group’s logo. To do so, it is necessary to create a custom embroidery program, which will incur a one-time fee and will not be charged for future identical embroideries. There will then be a price for the single embroidery, which depends on the type and complexity of the requested work.
If you wish to proceed, we invite you to contact us by email indicating the type of embroidery you would like to have. We are available to provide you with free, no-obligation quotes.
Yes, we offer two types of patches:
1) Custom embroidered patches, ideal for application on high-level karategi or judogi. These patches are designed to last over time, maintaining their quality even after numerous washes. The minimum order is 100 pieces.
2) Alternatively, we offer a more cost-effective solution: printed patches on pre-made bases. This option provides an effective result at a lower cost. For more details about our patches and available options, click here.
Embroidery on a belt or garment typically takes 1 to 2 additional days compared to normal order processing.
If you wish to replicate the embroidery from an existing belt onto a new one, we recommend contacting us before placing the order. This way, we can ensure the embroidery is done exactly as you desire.
This type of embroidery is not available as a standard option (and thus not listed among the proposed options), as the exact position of the “center” can vary depending on how the belt is tied. However, we can do this upon request: simply indicate the distance in centimeters from the label to the center of the embroidery.
If you wish to add multiple embroideries on the same end of the belt, you can contact us by phone to specify which one should be positioned on the outer end. If we don’t receive any communication from the customer, we place the elements based on our experience.
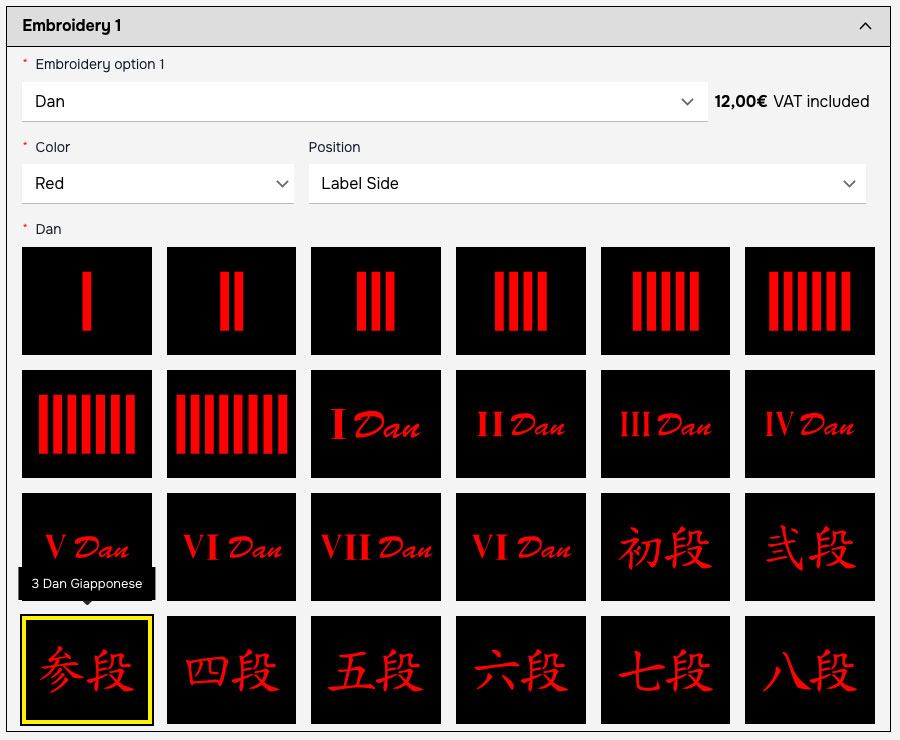
This is often the case with Dan ranks, which are embroidered along with the name on the opposite side of the label. The rule is that the Dan ranks are placed at the farthest end, leaving sufficient space between the name and the Dan ranks. This arrangement allows additional ranks to be added in the future without compromising the aesthetic and functional balance of the embroidery.
Certainly, it is possible to have embroidery on two lines. A classic example is the belts in Taekwondo ITF. To request this type of customization, we invite you to contact us by phone, and we will be happy to provide a non-binding quote.
There are two main methods for doing the embroidery:
- Embroidery done before the belt is made: in this case, the embroidery is done on the fabric, which is then sewn onto the belt. However, this technique has a limitation: the embroidery is covered by the longitudinal seams of the belt.
- Embroidery done on a finished belt: this method is the one we use, where the embroidery is done directly on the completed belt. This process makes the back of the embroidery visible, as the machine “knots” each stitch on the back side.
Generally, no. The evolution of printing technologies such as DTF has made embroidery on these items less common. Unlike judogi, karategi, and belts, polos and tracksuits are made from lighter fabrics that tend to wrinkle when embroidered.
No, returns are not accepted for embroidered or customized items.


